
How to solve a Rubik's Cube: 7 easy steps for beginners
Learn to solve a Rubik's Cube in 7 easy steps. Each step has a moving 3D cube, the moves you need and a practice button. Most people get it in 1 to 3 days.
You can learn to solve a Rubik's Cube. Not "maybe one day": this week. The method below has 7 steps and only 5 short move patterns. Most people who practise 20 to 30 minutes a day get their first solve in 1 to 3 days, and a solve from memory within a week or two. 🧩
A video shows you a solve once. This page gives you a small 3D cube for every case that you can play, pause and step through one move at a time, a practice button that hands you a cube with everything before that step already done, and a checkbox that remembers how far you got. The method is the layer-by-layer method that David Singmaster wrote up in 1980. It is not fast (a solve takes 100 to 150 moves), but it is easy to remember, and every faster method grows out of it.
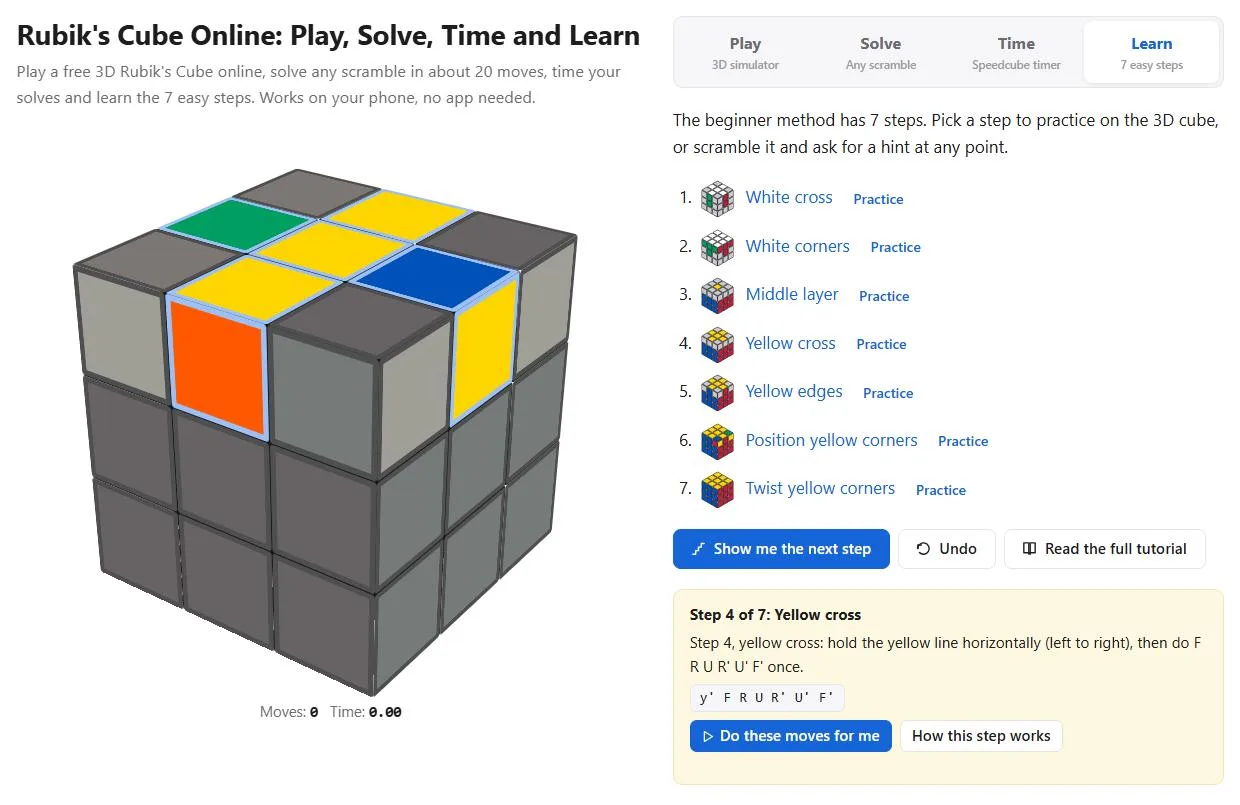
The first three steps take the longest to learn. That is normal. Once the white layer is done, the rest is "find the case, do the pattern".
Before you start
The three kinds of pieces
A Rubik's Cube has 26 small pieces of three kinds. The 6 centers have one sticker each and never move relative to each other: white is always opposite yellow, red is always opposite orange. The 12 edges have two stickers. The 8 corners have three.
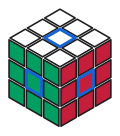
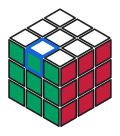
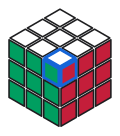
This is the fact that makes everything else click: a piece has exactly one home. The white-green edge belongs between the white and green centers, and nowhere else. You never move a sticker, you move a whole piece.
How to hold the cube
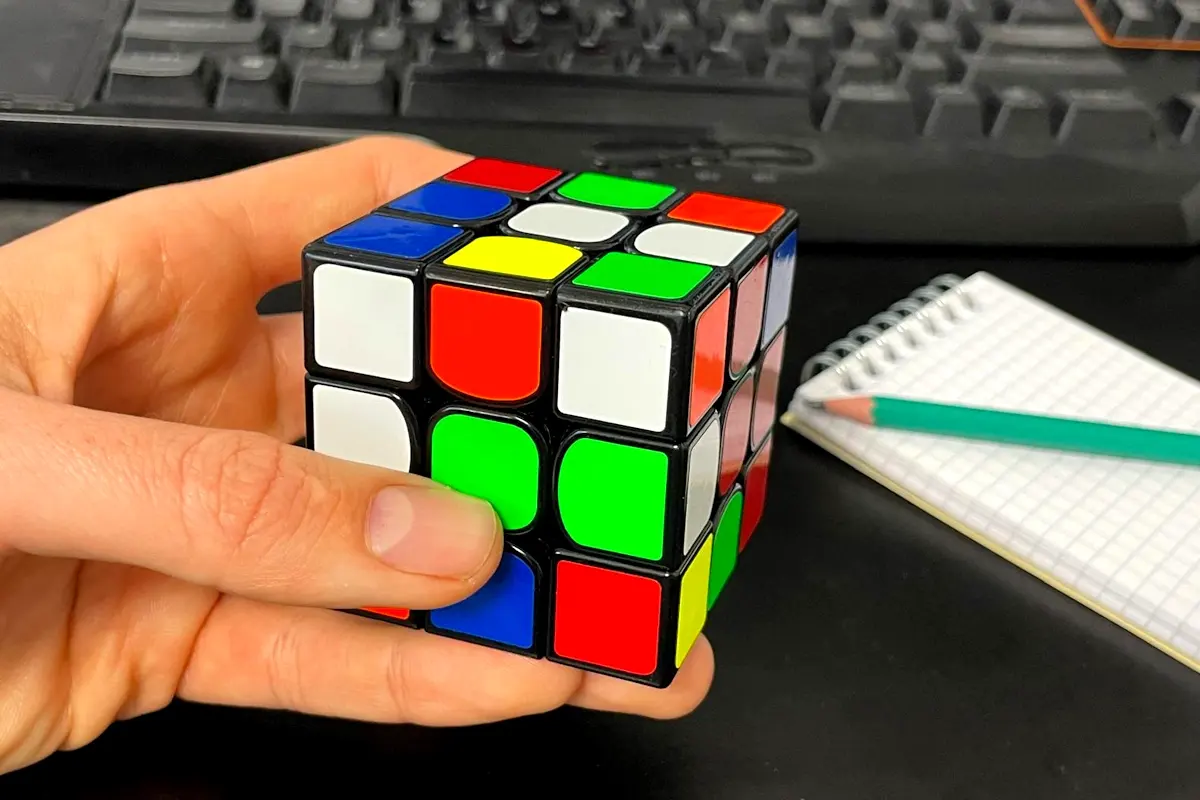
Hold it with the white center on top and the green center facing you, so your cube matches every picture here. We solve the white layer first, then turn the cube over and finish with yellow on top.
Six letters and two marks
Move patterns are written in Singmaster notation, the same letters every tutorial and every competition uses. A letter means: turn that face a quarter turn clockwise, as if you were looking straight at it. An apostrophe (') means counterclockwise. A 2 means a half turn.
| Letter | Face | Plain letter | With ' | With 2 |
|---|---|---|---|---|
| R | Right | right face up and away | right face toward you | half turn |
| L | Left | left face toward you | left face up and away | half turn |
| U | Up (top) | top layer to the left | top layer to the right | half turn |
| D | Down (bottom) | bottom layer to the right | bottom layer to the left | half turn |
| F | Front | clockwise, like a clock facing you | counterclockwise | half turn |
| B | Back | clockwise seen from behind | counterclockwise seen from behind | half turn |
D and B catch almost everyone, because "clockwise" is judged from the side of the face you turn, not from where you sit. The player below shows the four most common moves in one go. Press play and watch which face turns.
That is all the notation this page needs. Slice moves, wide moves and rotations are on the notation page, with a quiz, when you want them.
Track your progress
Each step ends with an "I can do this step" checkbox. It is saved in your browser only, so you can close the page and come back tomorrow.
White cross
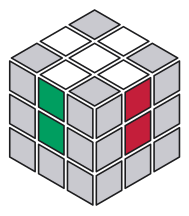
Find the four edges with a white sticker and move them to the top face, white facing up. The catch is the second color: the white-green edge must sit above the green center, the white-red edge above the red center, and so on. A cross with the side colors in the wrong order looks fine from the top and fails in step 2.
There is no single pattern for this step, because the edges can start anywhere. You learn three small moves instead and use them over and over, one edge at a time. The moves below protect the edges you have already placed.
The edge is in the bottom layer and white faces down. Turn the bottom layer (D) until the edge sits right under its own center, then turn that face twice. Here it is under the green center, so F2 brings it up.
The edge is in the bottom layer, but white faces sideways. Peek at the sticker on the bottom. Turn D until that sticker is under its matching center, hold that center in front, and do F' U' R U. The edge goes around the right side and up into its slot, while the U' and U keep the rest of the cross safe.
The edge is in the top layer in its right place, but upside down. Do F U' R U. Same trick, only the first move is F instead of F'.
The edge is in the middle layer. Turn the face it sits on so the edge drops into the bottom layer, move the bottom layer once so the edge is out of the way, and turn that face back. Now it is a bottom case. In the example, R' drops the edge, D moves it along, R repairs the right side, D2 puts it under green and F2 finishes.
If you're stuck: the usual problem is a cross that is white on top but wrong on the sides, so check all four side stickers before you move on. The other one is an edge that keeps landing white-sideways: you are doing F2 on an edge whose white faces you, which only flips it. Use F' U' R U for that one.
White corners
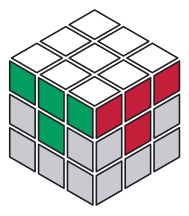
Now the four white corners. Each one has three colors and belongs between the three matching centers: the white-green-red corner goes where white, green and red meet. From here on you use one pattern, R' D' R D, and you repeat it.
Find a white corner in the bottom layer. Turn the bottom (D) until it sits right under its slot. Hold the cube so that slot is at the top right in front of you. Do R' D' R D and look. Not in yet? Do it again. The pattern takes the corner out, turns it a little and puts it back, so each round brings white closer to the top. It never needs more than 5 rounds.
White faces right: one round.
White faces down: three rounds.
White faces you: five rounds. Yes, five. Keep going, it comes.
A white corner already in the top layer but twisted or in the wrong slot: hold it at the top right front and do R' D' R D once. That kicks it down into the bottom layer, where you can turn D and treat it like any other corner. If it was in its own slot and only twisted, just keep repeating until white is up.
A tip from teaching this step: say the moves out loud, "right down, bottom left, right up, bottom right". The rhythm matters more than speed. The first time, this step takes an hour. That is normal, and the next day it takes ten minutes.
If you're stuck: the cross breaks apart while you repeat the pattern. Nothing is wrong; it comes back as soon as you finish a full R' D' R D, so never stop halfway through a round. Second: the corner goes in with white on top but the side colors are wrong. It was under the wrong slot. Kick it out and turn D once more.
Middle layer
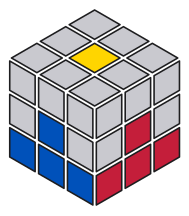
First, turn the whole cube upside down. The finished white layer goes to the bottom and the yellow center comes to the top. You will not see the white face for the rest of the solve, and that is fine. From now on, "top" means the yellow side.
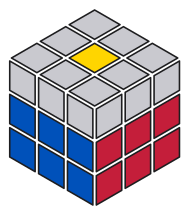
The middle layer has four edges, and none of them has a yellow sticker. So look in the top layer for an edge with no yellow. Turn the top (U) until its front sticker matches the center below it; it looks like a small upside-down T. Now look at the sticker facing up. If it matches the center on the right, the edge goes right. If it matches the center on the left, it goes left.
Going right: U R U' R' U' F' U F. The first four moves push the edge down into the slot and pull a corner out; the last four put the corner back.
Going left: U' L' U L U F U' F'. The same thing in a mirror.
Sometimes the edge you need is already in the middle layer, but flipped or in the wrong slot. Do the "going right" pattern with that slot at the front right, using whatever edge happens to be on top. The wrong edge pops out into the top layer. Then line it up and insert it properly.
If you're stuck: you cannot find a top edge without yellow, yet the middle layer is not done. The missing edges are stuck in the middle layer, flipped or swapped; use the pop-out trick above. Second: you matched the top sticker instead of the front one. The front sticker must match the center it sits on before you start.
Yellow cross
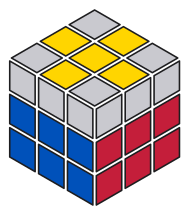
Two layers done. That was the hard part. Now look only at the yellow stickers of the top edges and ignore the corners. You will see one of four pictures: a dot (only the center is yellow), an L, a line, or the cross itself.
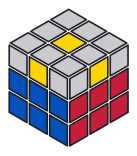
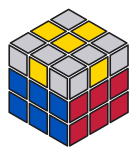
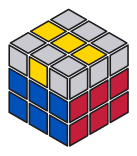
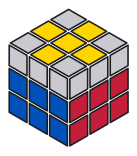
One pattern does the whole step: F R U R' U' F'. It flips two of the top edges over. Each time you do it, the picture moves one step along the chain: dot, L, line, cross. The only thing you must get right is how you hold the cube before you start.
Line: hold it so it runs from left to right, then do the pattern once.
L: turn the top until the two yellow edges are at the back and on the left. Do the pattern, and you get a line that already runs left to right. Do it again.
Dot: do the pattern once from any side and you have an L. Turn the top until the L sits in the back left corner (the U2 in the player) and carry on as above. Three rounds in total.
If you're stuck: you have the L but the pattern gives you a dot or another L. The L was not in the back left corner; turn the top and look again. Second: a middle layer edge is gone. One move went the wrong way, most often the F' at the end became F. Step through the player and copy it move for move.
Yellow edges
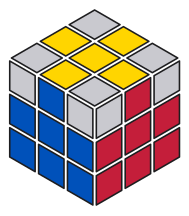
The cross is there, but its side colors are mixed up. Turn the top layer and watch the four side stickers of the cross. At some point two of them match their centers, either next to each other or opposite each other. (All four match? Skip to step 6.)
The pattern is R U R' U R U2 R' U. It swaps the front and left edges and leaves the back and right ones alone. It also shuffles the corners, but the next two steps fix those, so ignore them.
Two matching edges next to each other: hold the cube so they are at the back and on the right. Do the pattern once, then turn the top to line everything up.
Two matching edges opposite each other: do the pattern once from any side. Now turn the top until two neighbors match, hold them at the back and right, and do it again.
If you're stuck: only one edge ever matches, however you turn the top. You are looking at the corners by mistake; look only at the middle sticker of each side's top row. Second: the yellow cross falls apart. The U2 in the middle became a single U, or the last U was skipped.
Yellow corners in place
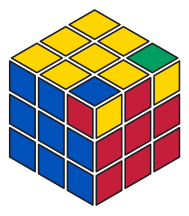
In this step a corner is "right" when its three colors are the three colors around it, in any order. The front right top corner needs yellow, the front color and the right color. Yellow does not have to face up yet; that comes in step 7.
The pattern is U R U' L' U R' U' L. It moves three corners around in a circle and leaves the front right corner where it is. So find a corner that is already right, hold the cube so it is at the top right in front of you, and do the pattern. If the other three are not right yet, do it once more.
No corner is right? Do the pattern once from any side. Now one corner is right. Turn the whole cube (not the top layer) so it is at the front right, and go again. In the player, the y' is that turn of the whole cube.
If you're stuck: the corners keep circling after three or four rounds. The "right" corner was not at the front right; look at its three colors again, the side stickers are easy to misread. Second: the cross edges moved. You turned the top layer to bring the corner to the front instead of turning the whole cube.
Yellow corners twisted
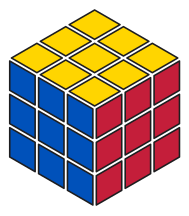
Last step, and it uses the pattern you know from step 2: R' D' R D. Hold the cube with yellow on top and a twisted corner at the top right in front of you. Repeat R' D' R D until yellow faces up on that corner. It takes 2 rounds or 4 rounds, never anything else.
Then, and this is the part that matters, turn only the top layer (U) to bring the next twisted corner to the front right. Do not turn the whole cube. Repeat the rounds. When every corner has yellow on top, turn the top layer once more to line it up with the sides.
Halfway through this step the cube looks scrambled. The bottom two layers fall apart and you will want to stop. Don't. The mess is part of the pattern, and it comes back together on the last corner, as long as you always finish the full R' D' R D and only ever turn the top layer in between. 😊
Two twisted corners: the first needs 2 rounds, the second needs 4.
Three twisted corners, 2 rounds each, with a top turn between them.
When I learned this, I turned the whole cube between corners instead of just the top layer, and had to start over twice before I saw what went wrong. It is the most common way to lose a solve on the last step.
If you're stuck: the last corner is done and the cube is still a mess. Count your rounds: an unfinished R' D' R D, even one move short, leaves the bottom layers broken. Second: the corners are right but the top layer is turned. Just turn U until the sides match.
You did it
That was your first solve. Do it again today, while it is fresh, and once more tomorrow. The third solve is usually the one where it stops feeling like reading a recipe. 🎉
What to do next, in this order:
- Solve it five times without looking at this page. The 3D cube can scramble itself for you.
- Time yourself with the timer. Most people start around 4 to 5 minutes and get under 2 minutes within a few weeks.
- Replace the slow patterns with faster ones. The algorithm pages start with 2-look OLL and PLL, which cut steps 4 to 7 down to 2 rounds each.
- Stuck with a real cube in your hands? Type its colors into the solver and it shows you a solution of about 20 moves. No position needs more than 20, which was proved in 2010 at cube20.org.
| Step | Hold | Pattern |
|---|---|---|
| 1. White cross | White on top | F2, F' U' R U, F U' R U |
| 2. White corners | White on top, slot at the front right | R' D' R D repeated |
| 3. Middle layer | Yellow on top, edge matched in front | Right: U R U' R' U' F' U F Left: U' L' U L U F U' F' |
| 4. Yellow cross | L in the back left, line left to right | F R U R' U' F' |
| 5. Yellow edges | Matching edges at the back and right | R U R' U R U2 R' U |
| 6. Corners in place | Right corner at the front right | U R U' L' U R' U' L |
| 7. Corners twisted | Twisted corner at the front right, turn only U between corners | R' D' R D repeated |
Watch the whole method
Prefer to see a solve from start to finish before you try? The video walks through the same 7 steps with the same patterns, so you can follow along with your cube.
Questions people ask
Why does my cube get messed up in step 7?
Because R' D' R D takes the bottom layers apart and only puts them back when it is finished. If you stop after R' D' R to look, or turn the whole cube instead of the top layer between corners, the bottom stays broken. Finish every round, and in between only turn U. If it still ends in a mess, do steps 1 to 6 again (they are quick by now) and try step 7 slowly with the player.
How long does it take to learn?
Most people manage a first solve with the page open in 1 to 3 days of 20 to 30 minute sessions. Solving from memory takes a week or two of doing it daily. A first solve takes 4 to 5 minutes; after a month, 1 to 2 minutes is typical with this method. Kids from about age 7 learn it as fast as adults, often faster.
Can I solve it without learning algorithms?
The first two steps, yes, and some people get the middle layer too. The last layer is another story: even Erno Rubik needed about a month to solve his own prototype in 1974. A pattern like R' D' R D is just a safe way to move one piece without breaking the rest, and the five on this page cover every position. The shortest solution for any position is at most 20 moves (see God's number), but finding it takes a computer, not a method.
Which cube should I buy?
Any cube sold as a speed cube for a few dollars turns better than an old stiff one from a toy shop, and that matters more than you'd think: a cube that catches on every turn makes the patterns feel harder than they are. Modern cubes have rounded inner pieces and adjustable tension, like the ones the top speedcubers use. Stickerless cubes last longer. Brand does not matter for learning.
What is the fastest method?
Almost all fast cubers use CFOP, which Jessica Fridrich made popular in 1997. It solves the cube in four stages with 57 + 21 last-layer algorithms, in about 55 moves. The current world record single is 2.51 seconds. Our beginner method is CFOP with training wheels: step 1 is the cross, steps 2 and 3 become F2L, steps 4 and 5 become OLL, steps 6 and 7 become PLL.
Do I have to start with the white face?
No. Any color works and the steps are the same. We start with white because nearly every guide, video and app does, so you can mix sources without confusion. If your cube has no white (some have black instead), use that face and the pictures still make sense.
Ready? Grab your cube, hold it white side up, and start with step 1. The practice buttons are waiting when you are.
Last updated: November 4, 2026